 文書化
文書化NAS共有の管理
Phoenix Editions:  Business Enterprise Elite
A NAS share may have multiple backup sets configured, with each backup set backing up a set of files and folders. With multiple backup sets, you can schedule backups when there is minimal network traffic and also perform backups of specific files and folders.
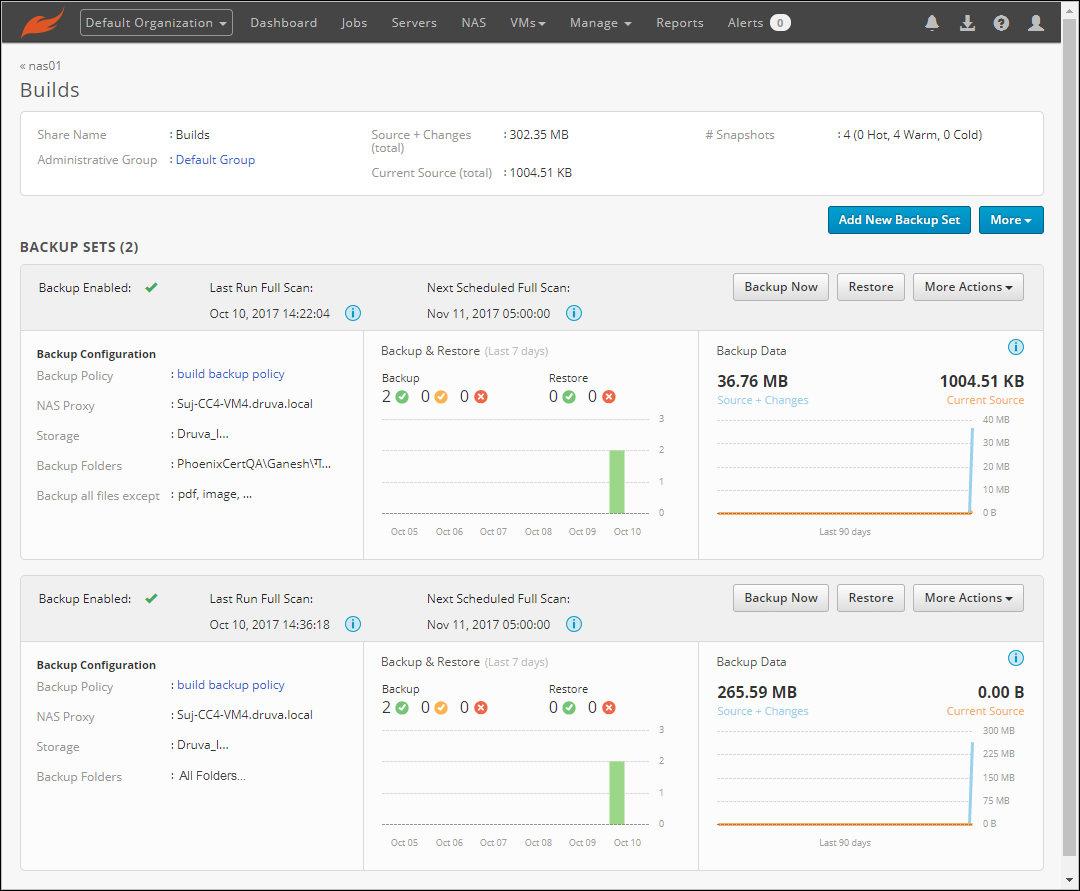
View NAS share details page
- Log on to Phoenix Management Console.
- On the menu bar, click All Organizations, and select the organization containing NAS devices.
- On the menu bar, click NAS and click the NAS device name containing the NAS shares.
- Click the NAS share for which you want to see the share details. This displays the details page of the NAS share.
Edit the NAS share name, credentials, and administrative group
- Log on to Phoenix Management Console.
- On the menu bar, click All Organizations, and select the organization containing NAS devices.
- On the menu bar, click NAS and click the NAS device name containing the NAS share.
- Click the NAS share which you want to edit. This will display the details page of the NAS share.
- Click More > Edit Share details. This displays the Edit Share Details window.
- Enter the details based on the description in the following table:
Field Description Share Name Add the new name of the NAS share. Credentials
Since the NAS proxy handles the backup from the NFS shares differently than that of SMB shares, you do not need to provide credentials for NFS shares.
Use NAS credentials
(for SMB share)Select to use NAS device credentials to access the NAS share. Username
(for SMB share)Update access credentials of NAS share. Password
(for SMB share)Administrative Group Assign the required administrative group. - Click Save. This saves the udpates made to the NAS share.
Back up a NAS share manually
You can perform a manual backup of individual NAS shares.
- Log on to the Phoenix Management Console.
- From the All Organizations list, select the organization containing the NAS device and the NAS share that you want to back up.
- On the menu bar, click NAS. This lists the NAS devices configured on the Phoenix Management Console.
- Click the NAS device with the share that you want to backup. This displays a list of NAS shares under the shares tab.
- Select the NAS share that you want to back up.
- Click Backup Now and then click Yes to confirm.
A manual backup occurs across all configured backup sets of the NAS share and the time and status are updated on in the Last Backup Status column.
Back up a single backup set manually
You can manually back up a single backup set of a NAS share.
- Log on to the Phoenix Management Console.
- From the All Organizations list, select the organization containing the NAS device and the NAS share that you want to back up.
- On the menu bar, click NAS. This lists the NAS devices configured on the Phoenix Management Console.
- Click the NAS device with the share that you want to backup. This displays a list of NAS shares under the shares tab.
- Click the NAS share assigned with the backup set that you want to manually back up. This displays the NAS share details page.
- Click Backup Now against the backup set that you want to back up individually.
- Click Yes to confirm.
A manual backup occurs only for the specific backup set of the NAS share.
Delete a NAS share from Phoenix
Before you begin, delete all the backup sets configured for the NAS share. See Manage backup sets for NAS shares.
- Log on to the Phoenix Management Console.
- From the All Organizations list, select the organization containing the NAS device with the share configuration that you want to delete.
- On the menu bar, click NAS. This lists the NAS devices configured on Phoenix Management Console.
- Click the NAS device with the share that you want to delete. This displays a list of NAS shares under the shares tab.
- Select the NAS share that you want to delete and click Delete.
- The NAS share gets deleted from the NAS device on Phoenix Management Console.
Error messages
Phoenix displays the following error message if you attempt to delete a NAS share without deleting the backup sets configured in the share.
Could not delete the NAS share as there are backup sets configured in it. To delete a NAS share, you must delete all the backup sets in it.
For any other error messages or internal errors, contact Druva Support.
Delete NAS share snapshots
If you are a cloud administrator, you can delete warm snapshots of NAS shares that you no longer require. If you are a group administrator, you can delete warm snapshots of NAS shares that belong to the administrative groups that you manage.
After you delete a snapshot, Phoenix purges the snapshot data from the warm storage, thus freeing up the storage space.
Note: You cannot delete the most-recent and cold snapshots of a NAS share. However, all snapshots get compacted according to the retention period defined in the backup policy.
Procedure
- Log on to Phoenix Management Console.
- On the menu bar, click All Organizations, and select the organization containing the NAS device and NAS share for which you want to delete the snapshots.
- On the menu bar, click NAS.
- Click the NAS device name containing the NAS share of which you want to delete the snapshots.
- Select the NAS share from which you want to delete the snapshots.
- Click Restore. This displays the Restore Data window.
- In the left pane, select the backup policy from which you want to delete the snapshot.
- In the left pane, expand the hot or warm node under Snapshots.
- Select the snapshots that you want to delete, and click Delete Snapshot. This deletes the selected snapshots.